
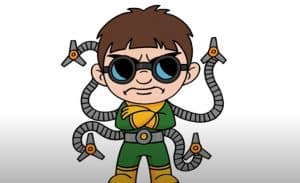
How To Draw Doctor Octopus Easy with this how-to video and step-by-step drawing instructions. Cartoon drawing tutorials for beginners and kids.
Please see the drawing tutorial in the video below
Video produced by channel : Cartooning Club How to Draw
You can refer to the simple step-by-step drawing guide below
Step 1
Let’s start with a stickman – who is made of sticks and circles, this will help us draw the basic proportions of the character, the position of the character and the position on the paper. First, a bit about proportions: the average growth of a man’s figure is equal to the sum of the lengths of seven to seven and a half heads, four of which are the length of the legs.
Today’s character is not very tall, but nevertheless, very broad shoulders. Sketch the hands resting on the sides, forming near-square angles at the elbows. Doc Ock’s head is round. But Octopus’s head is round because of the tilt of the head and because of its build – it is a bit overweight.
Step 2
Stickman is ready, let’s add some meat to the body of the Octopus. But first, we mark the head – draw a symmetrical vertical line of the face, which will divide the face into two equal parts. Then draw a vertical line that will help us draw the eyes. By the way, usually the eyeliner is in the middle of the face, but here it is higher due to the position of the head. Just below the eyeliner, draw the strokes of the nose and mouth.
The neck should look like a short tapered cylinder on which is located the head. Outline the body, slim to the waist, due to the pronounced chest and back muscles.. Use large balls to outline the shoulders. Draw the arms, in modified cylinder form. Then draw the hand (the clenched fist at this stage is represented by pentagons). Add volume, don’t forget to focus on stickman’s lines. Next – legs. Draw thighs, using shapes similar to cylinders, tapering towards the knees. Knees (and elbows) draw circles. Draw the shin, slim the foot and the foot itself.
Step 3
Draw our doctor’s business card – his metal tentacles. More precisely, in this step we outline their silhouettes. They should be smooth, round and should increase in size sharply towards the tip. Note that this increase is necessary to properly represent the distance on paper. One more note – the tentacles are attached to the back, near the junction of the thoracic and lumbar spine, two on each side, which you have to take into account when you pull the tentacles out.
Step 4
Silhouette of Doctor Octopus is ready, let’s start adding details. We always add silhouette details from head to toe and today’s lesson will be no exception.
So at this stage we start drawing facial features. Using the instructions from the last steps, draw wide glasses, short nose and mouth, clenched teeth, and long nasolabial folds. Also, draw the lines of the cheeks, cheekbones and ears, drawing the “pot” haircut. The hairline should always be drawn in the direction from the ends to the roots, that is, in this case – from the top.
Step 5
Let’s go below and draw the body. Erase the excess guide lines from the neck and use some short horizontal strokes to draw the folds of the fabric. Use a smooth line, extending from the trapezoid to the tentacle line to draw the collar. Then erase all the guides from the torso, leaving a small line of pectoral muscles. Draw a few lines on the body and circle the waist line.
Step 6
Draw tentacles. Collectively, these four genera in all versions of the Spider-Man story share a similar history. Talented scientist Otto Octavius designed metal tentacles, operated by remote control. After the explosion in the laboratory, the tentacles were buried in the back area, under the influence of certain substances, and the heat combined with Otto’s spinal cord, turning him into the terrible Doctor Octopus.
By the way, in many comics and sequels to this story appeared Norman Osborn, as Otto Octavius’s boss and head of research. But we are off topic. Draw on curved tentacles with horizontal stripes.
Step 7
Let’s draw the arms. Use the instructions from the previous steps to draw the arms, circling the outer contours. Add some folds to the area of the armpits. Use short strokes to draw muscle lines that protrude through the garment. Start drawing hands. When drawing a fist, look at the knuckles and tendons, as well as – the shadows of the fingers. Use two short curved strokes to draw the lines of the glove.
Step 8
In this step we draw Doc Ock’s legs. Remove the guide lines from the legs, add some creases in the knee area. Don’t forget to draw muscle lines in the thigh and shin areas. Use a few curved strokes to draw the lines of the shoes. By the way, do not forget about the folds on the boots in the ankle area. Also, just draw a few lines in the toe area, like in our example.
Step 9
Draw the ball. They should be made in a comic style – raw and contrasting. We should draw them in two steps – first, outline the outlines of the shadows, and then fill with a simple soft pencil. However, there is one feature – shadows on the metal tentacles. Pay attention to shadows and highlights on the tentacles. The shadows look like long, dark stripes, going through the entire length of the tentacles. To overcome halftones, use one-way bloom. Color him.
It’s a lesson we told you on how to draw Doctor Octopus prepared by HTDraw.com. Come to our website for new drawing lessons, goodbye!
The post How To Draw Doctor Octopus Easy Step by Step appeared first on How to draw step by step.
